By all accounts, Point Pinole Regional Shoreline is a park that probably shouldn’t exist. Prior to 1960, the land was owned by a company that manufactured gun powder and dynamite. This was followed by a brief time when Bethlehem Steel owned the point, before it was transferred to the East Bay park district in the 1970’s. Years of environmental clean-up and letting nature do its work have done the park a lot of good, and it has transformed into a lovely place to go for a hike and get great views of San Pablo Bay.
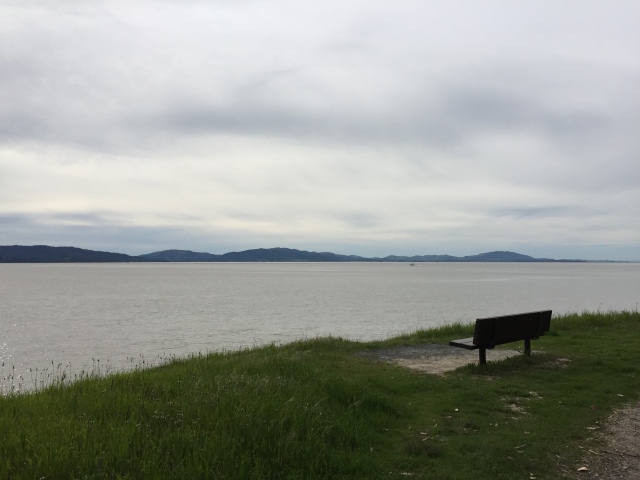
Driving up to it, you almost don’t expect to actually find a park amongst industrial warehouses and a county detention facility, but sure enough the sign for the park entrance appears when you least expect it. Park in the lot and follow the path to a pedestrian bridge over the train tracks. Here’s where the suggested hike that I took begins. Make an immediate left onto the Bay View Trail, and head downhill towards the water. Make a right when you reach the shoreline to continue on the Bay View Trail. At first, the trail doesn’t seem like the most scenic location. It follows the edge of San Pablo Bay and I think is near a landfill (it smelled like it). Bear with me, the trail gets better.
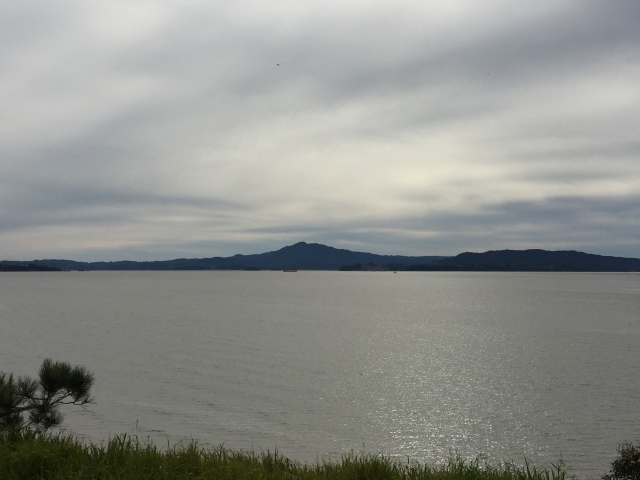
Hiking through eucalyptus on the Bay View TrailLooking towards Mt. Tamalpais
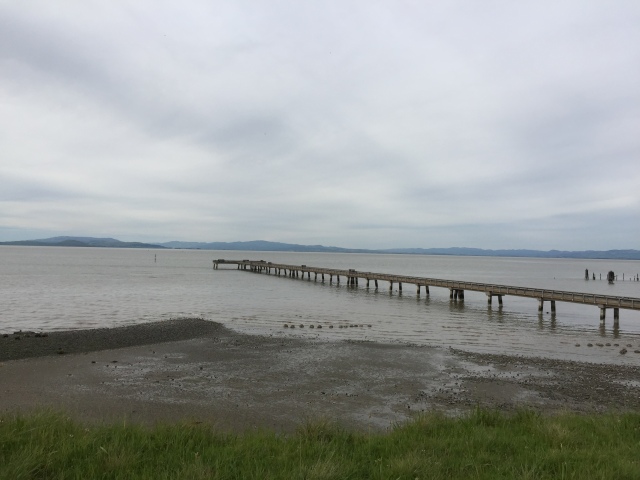
As you continue to follow the Bay View Trail, it will wind in and out of eucalyptus stands, giving great views of San Pablo Bay and Mt. Tamalpais beyond. As you hike out closer to the point, the cliff down to the water grows steeper (though you’ll never be climbing much). It’s about 2 miles of hiking to reach the pier at the end of the point.
Fishing pier at the end of the point.
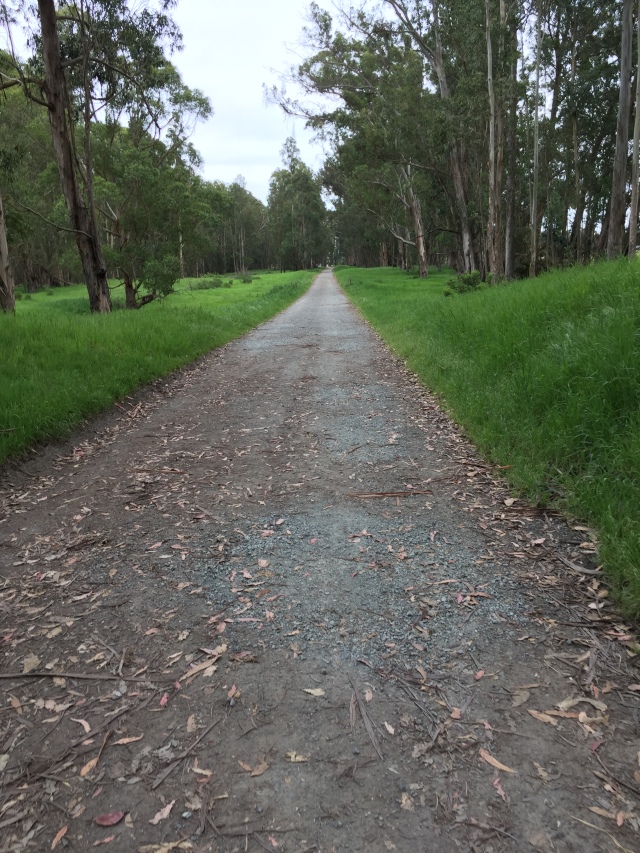
From here, follow the paved road south past the bathrooms and pick up the Owl Alley Trail heading south.
Owl Alley Trail is completely flat and straight, entering in and out of eucalyptus forests and grassland. When I visited in spring, the grasses were green and the wildflowers in bloom. Despite the lack of terrain it was quite a pretty scene. Follow this trail all the way to its end, then turn right onto the Cooks Point Trail. You’ll pass by the new entrance to Point Pinole, which hadn’t opened at the time I visited. Look for the Station Trail shortly after the new entrance, and make a left. This trail will take you back to the pedestrian bridge, where you can retrace your steps back to the parking lot. I found Point Pinole to be an enjoyable afternoon hike when the weather wasn’t too warm. I recommend a cool spring or summer evening, when the breezes are blowing off the bay.
Hike Stats
Distance: 3.94 miles
Time: 1-2 hours
Elevation gain: 200 feet
Fees: Parking is $3 when the kiosk is staffed. When it’s not, entrance is free.
Directions: From I-80, take the Richmond Parkway exit, head west. Turn right onto Atlas Road, then turn left onto Giant Highway. The park will be on the right just past the county detention facility.
Park map from the East Bay Regional Park District can be found here.
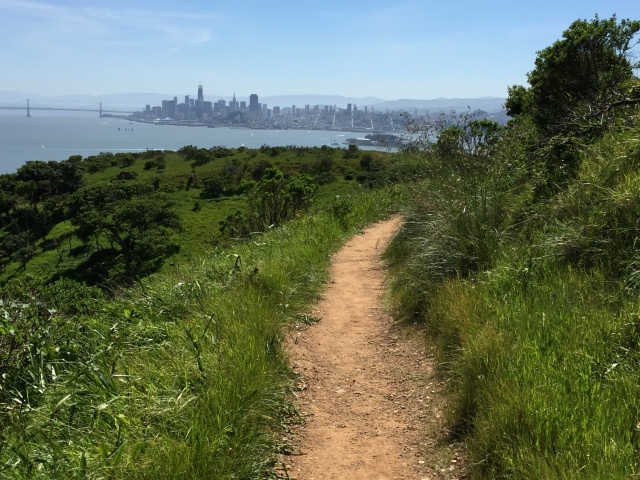
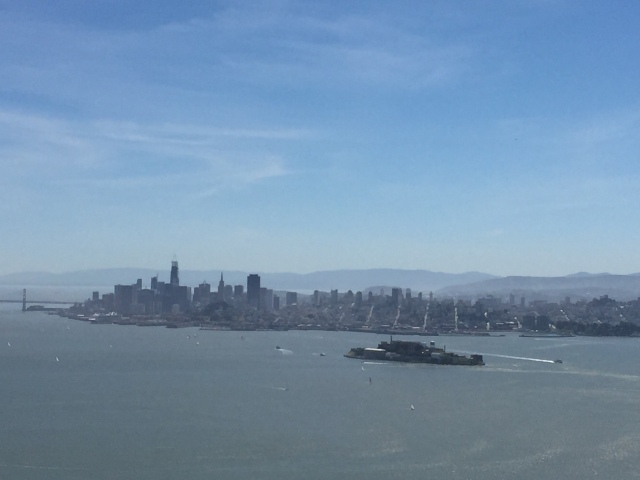
Angel Island sits in the middle of San Francisco Bay, just off the Marin County coast. As you might imagine, it’s position in the bay affords those who visit world class views of nearly the entire Bay Area. San Francisco, Oakland, Marin County, and much of the East Bay are visible from the island, plus three bridges: the Golden Gate Bridge, Bay Bridge, and Richmond Bridge. Mt. Tamalpais looms large to the north, while Mt. Diablo is visible to the east. Sound great? It is! The only catch is that Angel Island must be timed correctly, or else the views will be shrouded in fog. The day that I picked was near picture perfect, so naturally I felt it was finally time to visit this island that had been on my radar.
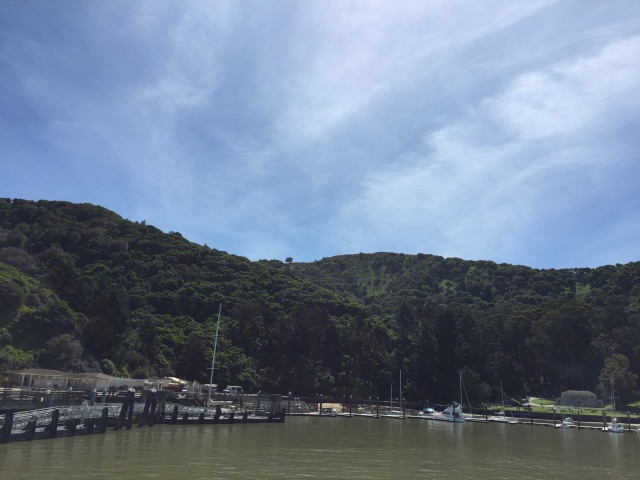
Pulling into Ayala Cove on the ferry from Tiburon
Getting to Angel Island requires a bit of planning. First, it’s necessary to take a ferry to the island. Year-round ferries run from Tiburon in Marin County, or from San Francisco. Seasonally in the summer, ferries also run from Vallejo and Oakland/Alameda. I opted for the Tiburon ferry as it’s more convenient to me coming from the North Bay. The schedule varies by day and month so be sure to check it before heading out. I paid $15 for a round trip ticket and that included my park admission. Not a bad deal if you ask me. The ferry ride was short, only about 15 minutes, and very smooth. In no time we had pulled up to the dock at Ayala Cove, the main dock for all ferries to the island. After disembarking and having a quick lunch, I headed out for the island’s interior.
There are two main hikes that most people do on Angel Island. The first is walking (or biking) the paved Perimeter Trail that circles the island. It’s around 5 miles around and allows you to see all of the sights (and views) of Angel Island. You can visit a building that at one time was an immigration station for boats arriving from Asia. There are also several old military batteries dating back to when Angel Island was a military outpost. Plus you get all of the same views of the Bay Area mentioned above. Since the trail is mostly flat, this would be a good hike for someone who doesn’t want anything too difficult or uphill. I do not prefer to hike on pavement, so I opted for the second main hike that goes into the island’s interior and reaches the summit of Mt. Livermore, Angel Island’s highest point at 788 feet.
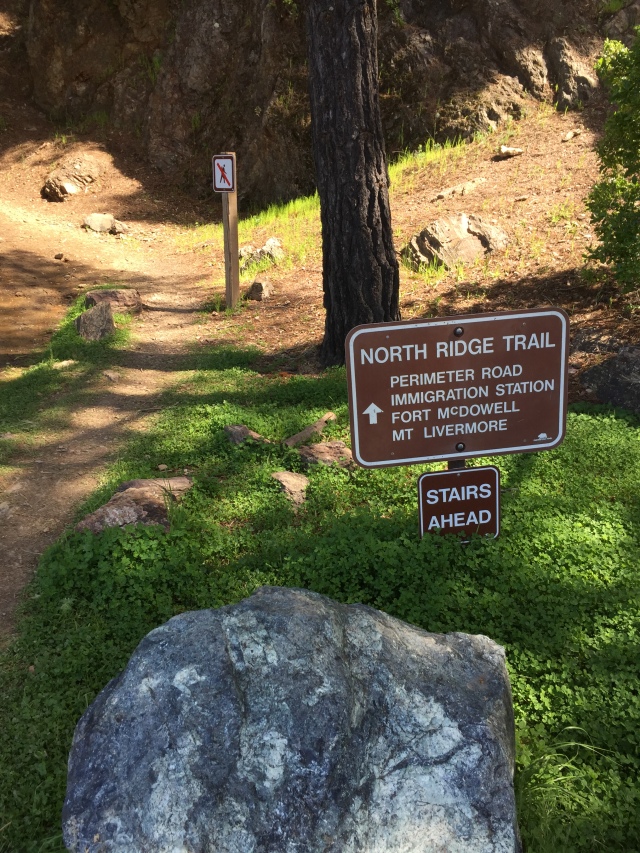
Look for the North Ridge Trail as you exit the ferry
To do this hike, head to the left as you exit the ferry away from the information kiosks and bathrooms. There a small dirt trail heads uphill signed as the North Ridge Trail. The trail heads uphill at a moderate grade and climbs a steep, but relatively short set of stairs. After huffing and puffing up the stairs the trail dumps you out onto the Perimeter Road. Cross the road and pick up the North Ridge Trail on the other side. Now, the trail climbs at a much more gentle grade and does so for much of the remainder of the hike. The trail winds its way up the north ridge of the island looping in and out of shade with spectacular views at every turn.
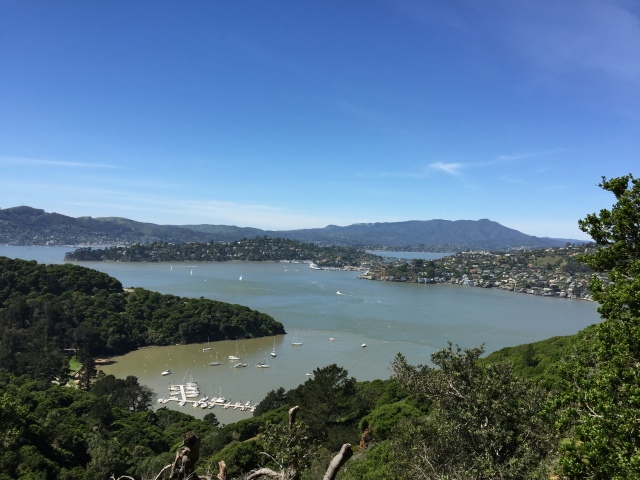
Looking back down to Ayala Cove with Tiburon and Belvedere beyond it and Mt. Tamalpais looming in the background.
First, Mt. Tamalpais and the Marin coastline appears. Then, the Richmond bridge comes next, followed by the East Bay hills, Berkeley, and Oakland. The best part about this hike is that the view changes at every turn, and every bit of it is spectacular. Continue to follow the North Ridge Trail past the gravel fire road and deeper into the interior of the island. Once you get closer to the summit of Mt. Livermore, the forest will start to thin. After 2.5 miles of hiking, the short spur to the top of Mt. Livermore branches off to the right. Follow this short trail up to the top. Once there, the entire Bay Area unfolds before you and some of the first great views of San Francisco and the Golden Gate Bridge appear.
San Francisco looks close enough to touch from the summit of Mt. Livermore
I spent several minutes at the top admiring the spectacular vista. San Francisco looks close enough to touch, and several local mountains and landmarks are visible from up there. It’s amazing to think that the highest point on Angel Island is only 788 feet, but its location in the middle of the bay affords it million dollar views. After I’d had my fill of views (and pictures), I made my way back down the spur trail back to the junction with the North Ridge Trail. This time, turn right onto the Sunset Trail.
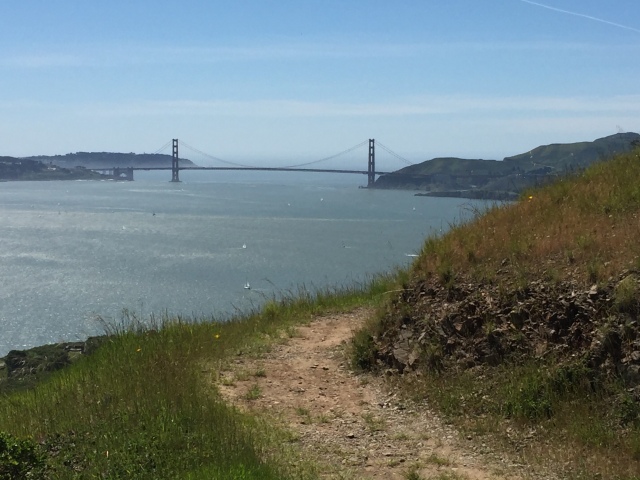
The Sunset Trail offers unobstructed views of the Golden Gate Bridge and San Francisco
The Sunset Trail takes on a whole different character than the North Ridge Trail. For one, the trail traverses the much less vegetated south and west side of the island. This lack of vegetation allows for constant views of San Francisco and the Golden Gate Bridge as you wind your way down the ridge. As if you weren’t thinking it before, trails like this only serve as a wonderful reminder of how lucky we are to live in such a beautiful region. Eventually though, the trail will dip back into forest and switchback its way back down to Ayala Cove and the ferry dock. I had some time to kill to I went to the visitor’s center/museum and read up on some of the history of the island. Check it out if you want to hear about Angel Island’s storied past. Eventually I grabbed the ferry and enjoyed the smooth, but crowded boat back to Tiburon. Bottom line: if you can time the weather right, Angel Island is a not to be missed hike. This might be on my top list of favorite hikes in the Bay Area.
Trip Stats
Distance: 5.5 miles
Time: 2-3 hours
Elevation gain: 800 feet
Fees: Park entrance is included in the round-trip ferry tickets. From Tiburon, I paid $15 round-trip.
Directions: Take the ferry from either Tiburon or San Francisco. Tiburon Ferry Terminal is located at the end of Highway 131 from US-101 in downtown Tiburon.
Park map from the California State Parks can be found here.
Hi all! Sorry about the lack of posts over the last few months….I guess that’s what happens when life gets in the way. However, I wanted to say that it’s been an EXCELLENT spring out on the trails of Northern California! I’ve spent many Saturdays in some of NorCal’s most spectacular spots and can’t wait to share them all with you. I’ve been writing posts on my computer as I went along, and now plan to slowly post them all with the pictures I took. I’ve got lots to share with all of you and hope to be all caught up soon. Also coming soon will be a Facebook page for the blog and perhaps a name change! What will it be? I guess we’ll have to wait and see…. 🙂
This is when you know it’s getting serious…the coffee comes out
Spring in Northern California is a magical time of year. The hillsides turn green and burst with color from wildflowers. Streams fill to capacity and fill up our lakes and reservoirs. One of my favorite aspects of spring though is the spectacular waterfalls that can be found throughout the region. Since Northern California is typically dry 5-6 months of the year, many of these waterfalls are seasonal and dry up by summer. To me though, this only adds to their appeal. Finding one flowing at full force when you know in a few months it will mostly (and sometimes completely) dry up makes the sight even more magnificent. This hike’s destination was to one such waterfall, named Zim Zim Falls.
Zim Zim Falls is located north of Lake Berryessa in Napa County, in the Knoxville Wildlife Area. Doing this hike is somewhat of a commitment because of the drive required to get to the trail itself. From my house in Vacaville it took us approximately an hour and 30 minutes to drive there, even though it’s only around 50 miles away. Roads around Berryessa are narrow and windy and you’ll need to take your time. Once you pass by the lake on Knoxville-Berryessa Road, the road narrows to one lane and becomes bumpier. There’s even a few concrete low water creek crossings so be careful when crossing them (one had water flowing over it as we crossed it). Parking is available just before mile marker 24. You’ll see a small pull out to your right and a green gate to your left. Start the hike through the green gate.
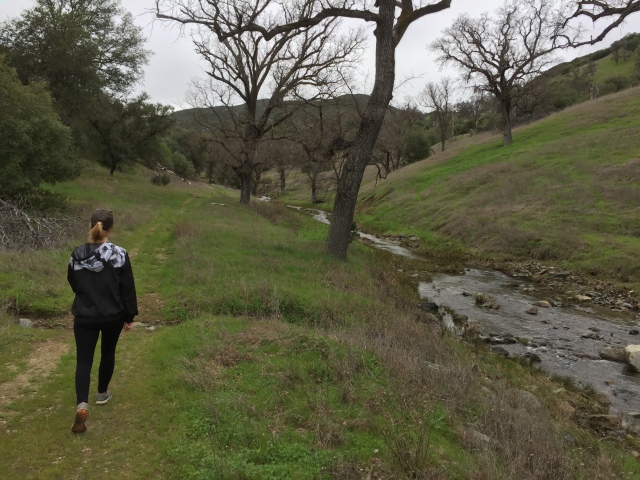
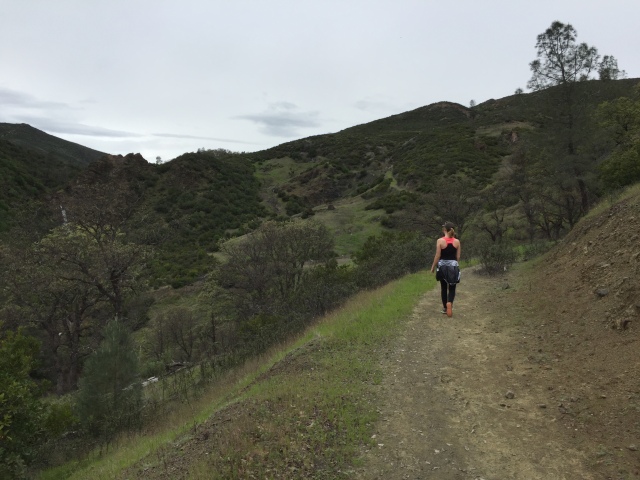
Once we started through the gate we found ourselves walking along Zim Zim Creek that led us into a small canyon. For most of the remainder of the hike the trail follows the creek up the canyon, including at least 8-9 crossings with no bridge. It’s important to note that if you do this hike, your feet will get wet. The earlier you accept this the easier it will be (take it from someone who knows). With that part out of the way, this turned out to be a great, easy hike considering the distance. Most of the canyon is flat and has no significant elevation gain until the very end approaching the falls. The trail follows Zim Zim Creek up a pretty canyon with views of the surrounding rugged terrain. It’s pretty easy to follow most of the time (it looks like at one time it was an old Jeep road).
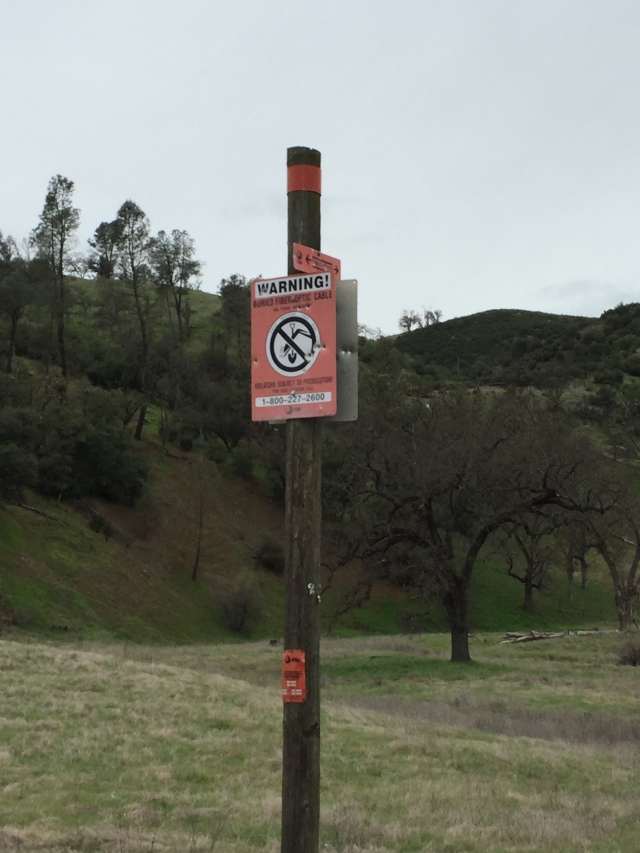
One minor curiosity was the presence of many red “DON’T DIG” signs from AT&T; a very odd sight on this trail in the middle of nowhere. I found them eventually to be useful though at times when I needed to regain the trail after a creek crossing. Overall though, we just followed the main trail all the way up the canyon until it starts to narrow. At a trail junction at the end of the canyon, there’s a large pink boulder. Here, we took the trail to the right and started heading uphill.
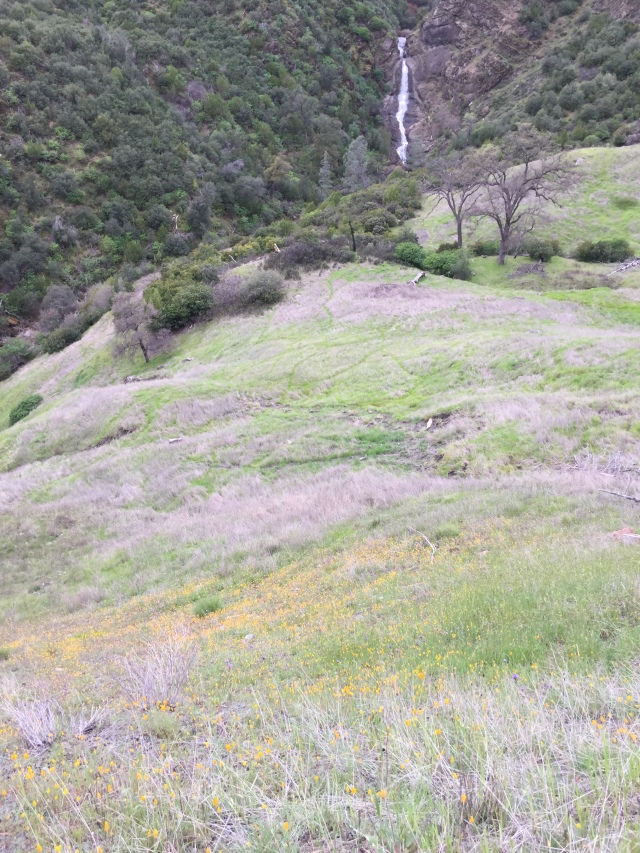
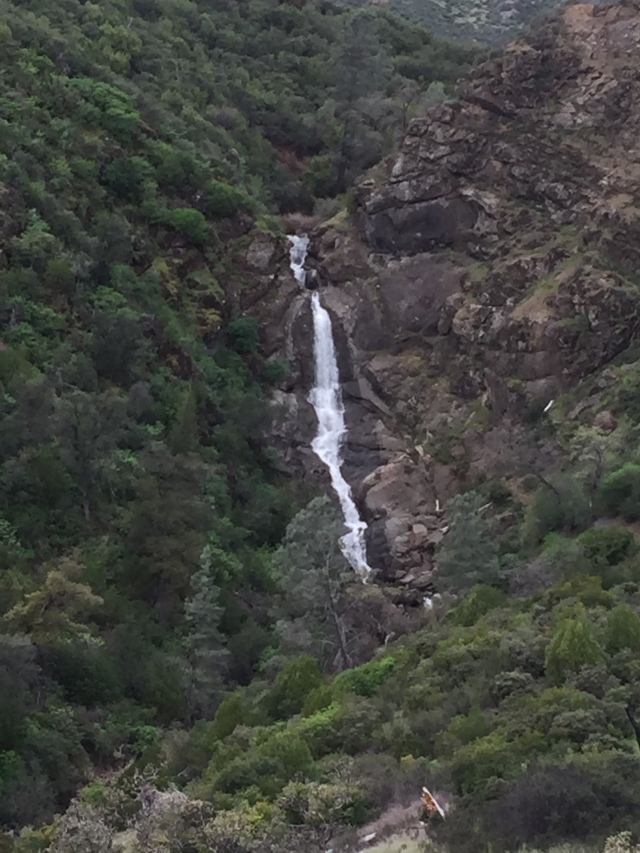
Thankfully, the uphill portion is short and soon we rounded a bend and Zim Zim Falls came into view. Though the viewing area is quite a distance away from the falls, you still get a great view of it. Here, we stopped for a quick lunch while we admired the roar of the falls.
At the time of the hike (mid-March), it was going strong from all the recent rains. The trail continued farther up the side of the canyon to the top of the falls, but when we hiked part of the trail was washed out. Thus, we were content to view the falls from afar before returning back down to the canyon.
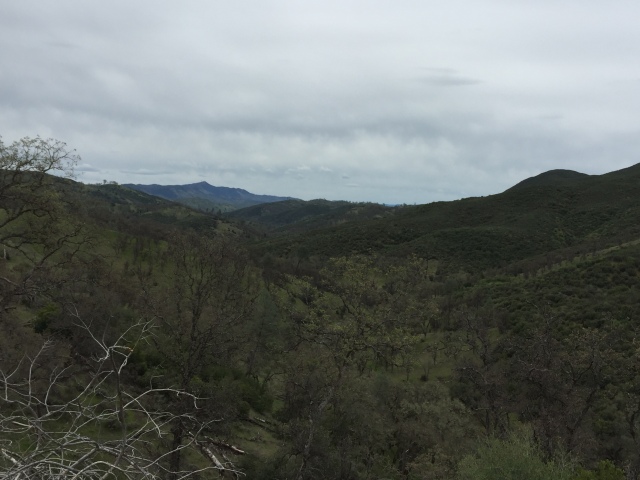
Make sure to take note of the view down the canyon as you head downhill. Straight ahead is Berryessa Peak at just over 3,000 feet. Once we returned to the pink boulder, we attempted to reach the base of the falls as other trip reports have noted. However, I found the narrow “trail” to be too treacherous for my liking and decided to turn back. We returned to the parking area just the way we came to complete an 8 mile round trip hike.
Trip Stats
Distance: 8 miles
Time: 3 hours
Elevation gain: 600 feet
Fees: Parking and access are free
Directions: From I-80 in Vacaville, take I-505 north to Winters before getting off on Highway 128 West. Follow Highway 128 up into the mountains and towards Lake Berryessa for approximately 25 miles. Make a right onto Knoxville-Berryessa Road. Drive for 23.5 miles on this road past the lake. Look for the mile markers on the right side of the road. When you see mile 23 start looking for the parking area with a green gate on the left. If you pass mile 24 you’ve gone too far. Parking is off to the right. I would recommend doing specific directions with Google Maps and print them before you go, as there is little cell reception in this remote area.
Well folks, I’m back! It’s been a while since I’ve posted on here. After a strong start to 2016 in filling my weekends with hikes, I started to taper off during the summer as life got in the way. Then, winter brought a deluge of rain to California that was much needed at first, but quickly became too much of a good thing. Flooding became widespread all over northern California and the number of sunny days to get out hiking became very thin. But, today we finally had a sunny weekend where I wasn’t busy, so I was determined to make it out onto the trails and kick off the 2017 hiking season. With all of the recent rains, finding a good waterfall to hike to seemed like a natural choice. I chose Cataract Falls, one of the more popular waterfall hikes in the Bay Area. It certainly did not disappoint!
Cataract Falls is located on the west slope of Mt. Tamalpais in Marin County, just north of San Francisco. The falls itself is on land owned by the Marin Municipal Water District, in the Mt. Tamalpais Watershed. One of the things that has always amazed me about Marin County is the vast amount of open space and parks accessible to the public considering the county’s relatively small land area. In addition to several national and state parks within the county, there are countless parks and open space lands owned by the Marin County Parks, Marin County Open Space District, and Marin Municipal Water District. Many of them run together, creating miles and miles of parkland in the otherwise crowded Bay Area. As you might imagine, hiking and other outdoor activities are very popular in Marin, so in order to beat the crowds, I got an early start to make the 1 hour and 20 minute drive to the trailhead. My early bird tendencies paid off; when I arrived at the trailhead there were only a handful of cars in the lot. By 8am, I was on the trail heading towards the falls.
Due to the main parking area for Cataract Falls on Fairfax-Bolinas Road being closed from storm damage, I started my hike at the Rock Springs trailhead, located at the corner of Ridgecrest Blvd and Pan Toll Road west of Mill Valley. It’s a long, twisty ride up here but scenic at every turn. My inspiration for this hike came from a trip write up on Bay Area Hiker in which the writer suggested a loop hike starting at Rock Springs, passing by Cataract Falls, then making a large loop back to the parking area. Perfect, just what I wanted.
Cataract Trail with Cataract Creek to the right
Starting out, I followed the Cataract Trail as it very slowly descended towards the falls. The path is well maintained and follows alongside Cataract Creek, which grows larger as you get closer to the waterfall. You’ll cross the creek a couple of times as you hike under a nice canopy. I’m sure that In the summer this provides respite from the sun, but this particular morning, it made it a tad chilly. At 1.2 miles you’ll pass by the Laurel Dell picnic area and junction with the Laurel Dell fire road. Stay straight on the Cataract Trail. Continue to gently descend as Cataract Creek grows larger. At 1.4 miles you’ll see the junction with the High Marsh Trail. Continue a short distance on the Cataract Trail to reach the falls. Like many good waterfalls, it’s the type where you round the corner and exclaim, “wow!”
Cataract Falls was especially impressive from all the winter rains and I expect it will remain so for at least a couple more months. Though it flows year round, it’s best to go in the late winter or spring so that you’ll get the full effect of the falls. I took a few minutes to savor the falls and take a few pictures before continuing on with the loop. I retraced my steps back to the junction with the High Marsh Trail, and turned left onto it.
The trail bends away from Cataract Creek and comes out onto a grassy bald with good views to the north and west.
Looking back into the Cataract Creek canyon
Behind me was a good view of the canyon containing Cataract Creek and the falls, enveloped in a canopy of douglas firs. Fog hung in the air to the west, obscuring any possible ocean views but still pleasant to look at. The trail ascends slightly then heads back into forest. Most of the remainder of the High Marsh Trail was an up and down roller coaster through dense forest, ascending to a ridge before descending to a creek, then repeating the process. Some of the grades can be quite steep, but they never last for very long before leveling out or descending.
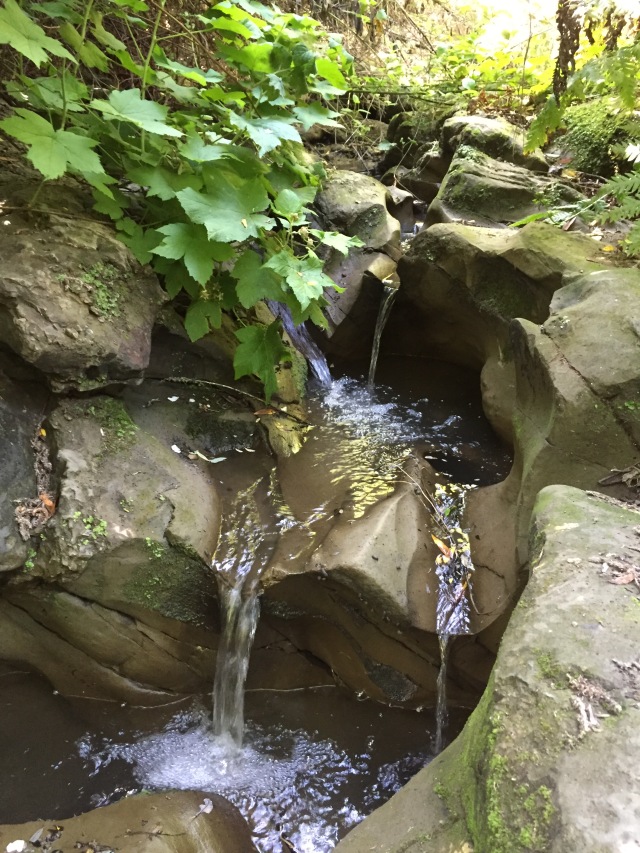
Surprise waterfall along the High Marsh Trail
Along the way I passed a surprise waterfall that I can’t seem to find the name for. I also crossed a boggy section of trail, supposedly where the name High Marsh comes from. I crossed several trail junctions but stayed on the High Marsh Trail until reaching the Kent Trail at 3.5 miles, turning right onto it. The Kent Trail ascends through forest and chaparral, providing interludes of views. It’s a bit rocky in spots to watch out for slippery rocks (as I found out on this hike). At 4.5 miles the Kent Trail ends at Potrero Meadow picnic area.
Potrero Meadow
Pass through the picnic area to the Laurel Dell Fire Road, and turn left. After about 50 yards, make a right onto the Benstein Trail. Here you’ll have to really watch for slippery rocks as this section of trail is quite rocky. The trail climbs moderately up a grade before leveling out and reaching the Lagunitas-Rock Springs Fire Road at 5.5 miles. Follow it for a very short distance before turning onto the Benstein Trail as it branches off to the right. The last mile to the parking area is a nice, easy descent through a pleasant canopy of firs, madrones, and oaks. You’ll need to make just a couple more turns, left onto the Simmonds Trail as the Benstein Trail dead ends into it, then left onto the Cataract Trail once more before returning to the parking area.
Trip Stats
Distance: 6.5 miles
Time: About 3 hours
Elevation gain: 900 feet
Fees: Parking is free at the Rock Springs trailhead (but get there early on sunny weekends, it fills up fast!)
Directions: From US-101 in Mill Valley, take Highway 1 towards Stinson Beach. Turn right onto Panoramic Highway and follow it as it twists and winds up Mt. Tamalpais. Turn right onto Pan Toll Road at the Pantoll Campground. The Rock Springs parking area is where Pan Toll Road dead ends into Ridgecrest Blvd.
Trail map from the Marin Water District can be found here. Or another from the California State Parks here (it includes the watershed area in addition to the adjacent Mt. Tamalpais State Park).
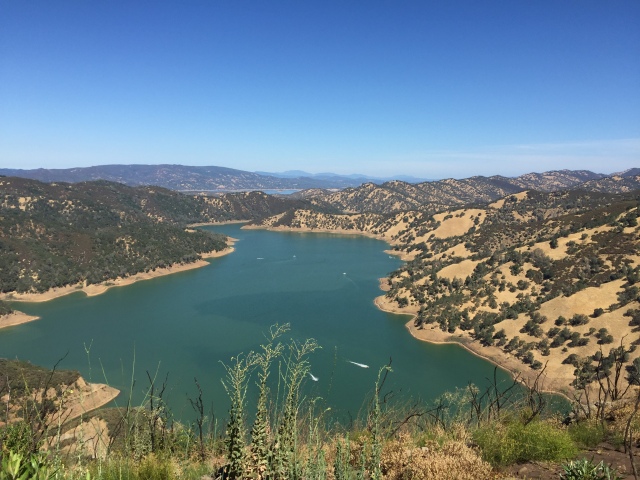
Sometimes people will ask me for recommendations on where to go hiking that’s close to Solano County but still moderately challenging with some great views. Almost always, I tell them to head over to Stebbins Cold Canyon Reserve, located near Lake Berryessa about 9 miles west of the town of Winters. This park, owned and maintained by UC Davis, encompasses a steep canyon and a portion on the Blue Ridge, a long ridge that extends much of the length of the Coast Range in Solano and Yolo Counties. The elevation gain on this loop hike is significant enough to be a challenge, but not enough to be overwhelming. Plus the views of the lake and surrounding mountains are sublime!
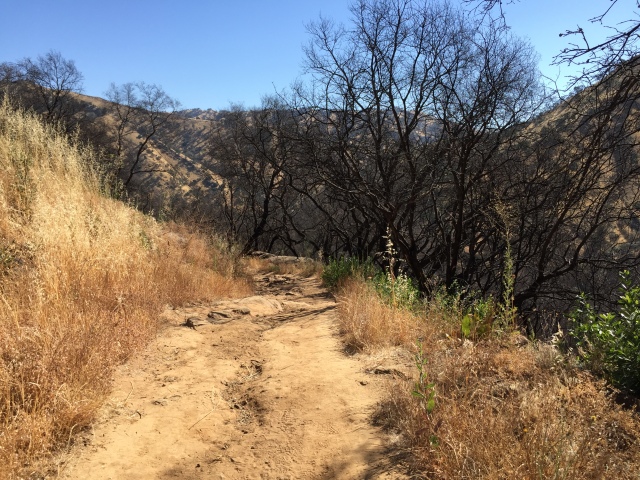
I’ve been waiting to hike this trail for quite some time. I hiked it a few years ago with my wife and since I’ve been getting back into hiking I’ve been wanting to do it again. Unfortunately, that was not possible until recently. Last summer the Wragg Fire burned much of the preserve and as such it was closed until this past May. I finally had a free Saturday where the weather was tolerably cool enough, so I called up a friend of mine to see if he wanted to tag along and he obliged. We hopped in the car, drove to the trailhead and parked before beginning our hike. Follow the signs to the trailhead as the trail configuration has changed since the preserve reopened (this more applies for people who have done this hike before.)
The loop hike that most people do at Cold Canyon is a 5.5 mile loop called the Homestead-Blue Ridge Trail that follows the canyon floor for part of it, and climbs up onto the ridge for the other half. There are two ways to do the hike. You can either follow the mostly flat canyon floor and climb up the ridge slightly more gradually with stairs, or climb up the ridge immediately and then the rest is mostly downhill. We opted for the second one. Immediately we started climbing up the ridge, following the tight switchbacks in some places. What struck me almost immediately was how much vegetation had already started to grow back from the fire the previous year. Most of the trees were burned but a lot of the grasses had filled in already. As we climbed we admired the increasingly good views that were forming behind us of the nearby mountains, and eventually the Central Valley beyond.
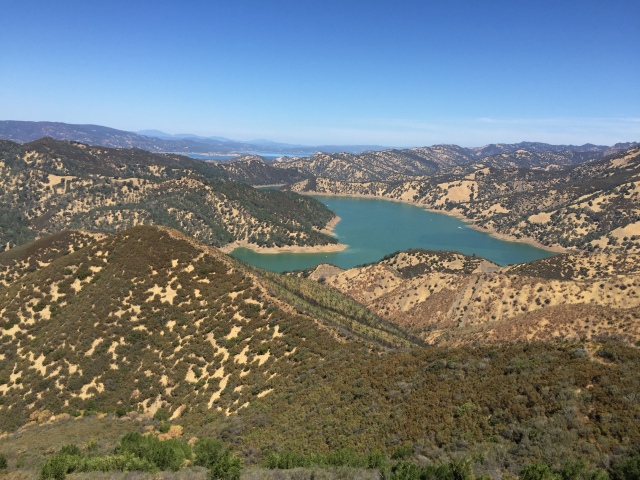
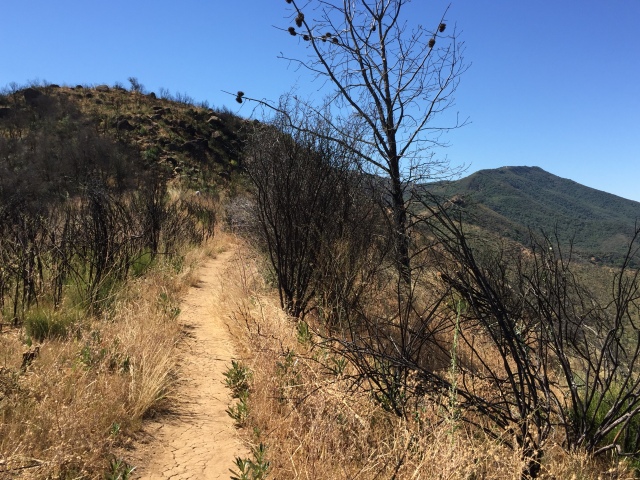
After about 1.8 miles, you’ll finally reach the top of the ridge and your first views of Lake Berryessa appear. Take a break, eat a snack, and soak it all in. These views will stay with you the entire time you’re on the ridge. As you hike farther south you’ll have to do some rock scrambling but nothing too difficult. Notice all of the vegetation that was burned out during the Wragg Fire. The last time I hiked this trail it was lined with chaparral type plants and manzanita bushes. Now, most of these are gone and the trail is very exposed. I hope you brought your sunscreen!
As you hike farther south you’ll also notice that on your left, the trail is bare but on your right vegetation exists and has been cut in some places. It looks like this trail was used as a fire line in the efforts to fight the fire. This will also be evident if you look out along the ridge; the left side is burned but the right (towards Berryessa) still remains intact. Around the 3 mile point, you’ll reach the trail’s highest point, around 1500 feet. At this point it will begin to descend and eventually meet up with the Homestead Trail and Tuleyome Trail.
Follow the Homestead Trail and you’ll start to descend steeply down stair after stair. At this point you might be glad you climbed the ridge first and now don’t have to climb these stairs. Near the 4 mile point you’ll reach the bottom of the canyon. Here the trail looks much more different than the ridge line; it’s shady and has a nice creek running along it (dry at the time we hiked). You’ll also pass by the old Vlahos homestead, though all that remains is a few stone foundations. They are worth a look though. You can see the foundations, an old retaining wall, and the cold storage. Among all this we saw an abandoned fire hose, no doubt left over from the fire the previous year. From here we hiked the last 1.5 miles along the canyon floor, admiring some of the plants both burned and not. We returned to our car and drove down to Winters where we had a great lunch at a local coffee shop downtown (highly recommend the Turkey Pesto sandwich at Steady Eddys!)
Trip Stats
Distance: 5.48 miles
Time: 2-3 hours
Elevation gain: 1260 feet
Fees: Parking and entrance are free, though a $2 donation is accepted, self pay at the entrance.
Directions: From the town of Winters, take CA-128 West towards Lake Berryessa. Pass by the Canyon Creek Resort and cross the bridge over Putah Creek and you’ll see a sign indicating you’re entering Solano County. Start looking to your right for the parking area as it comes up quickly. Park here and follow the signs to the trailhead.
– Bring lots of water. There is no shade for most of this hike and temperatures can be very warm here. Learn lessons from me; I ran out of water my first time hiking here.
– Wear sunscreen. As I said before there is little shade and now even less since the Wragg Fire burned out a lot of vegetation.
– Try not to go when it’s hot. You’ll hate yourself for it!
One of the best parts about living in the Bay Area is the multitude of micro climates that exist here. The saying around here goes, “If you don’t like the weather, go somewhere else.” That could not be more true than during the summer in the Bay Area. Where I live is much more inland and thus doesn’t get as much of the coastal influence as other parts of the Bay Area. That means it gets hot….really hot. On this particular day, our forecast was looking like temps nosing above 100 degrees (not at all uncommon in Vacaville). So, living up to the local saying, I went somewhere else for my hiking pleasures this weekend. I wanted somewhere still fairly close but with much cooler weather and great ridge line views. Heeding the recommendation of a book I have on Bay Area hiking, I headed to Wildcat Canyon.
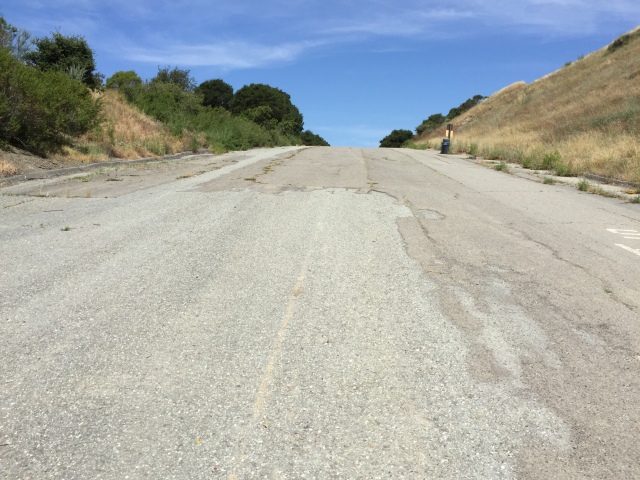
Wildcat Canyon Regional Park is located in the hills above Richmond and El Sobrante and is the northernmost in a line of regional parks that protect most of the East Bay hills. It’s also the northernmost terminus of the San Pablo Ridge, which extends for most of the spine of this park and Tilden Regional Park, its more well known neighbor to the south. This was my destination as I pulled into the rather large parking lot and began my hike along the Wildcat Creek Trail. Parts of the WCT are paved and others are pavement crumbled into dirt. This was clearly at one time an actual road open to cars. The vegetation surrounding is enough to be interesting but not a lot of shade exists on this part of the trail.
After 0.4 miles, bear left on the Belgum Trail. Shortly after you’ll pass the old Belgum estate, accompanied by an informational sign that was interesting to read. This trail is where you’ll do most of your climbing, winding your way up towards the top of San Pablo Ridge. At 1.3 miles you’ll come to a fork where three trails meet. Take the middle trail that heads slightly downhill and around a large hill in front of you (not the Clark-Boas Trail). This is the start of the San Pablo Ridge Trail and after a bit more climbing the trail will bear to the right and start following the ridge.
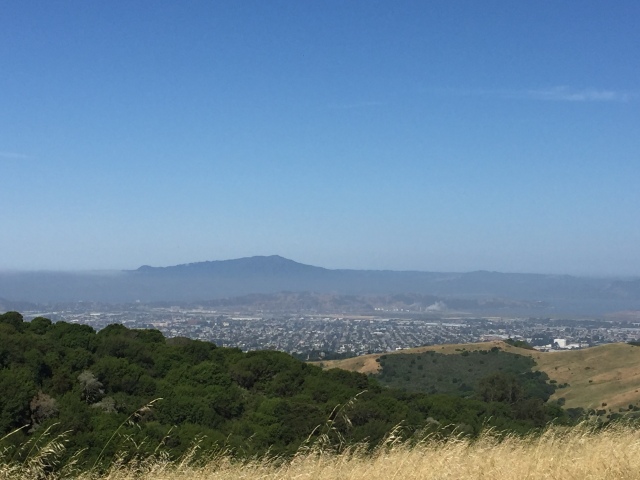
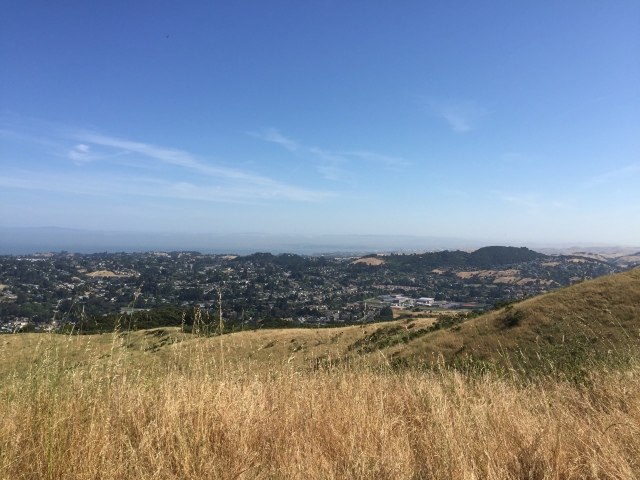
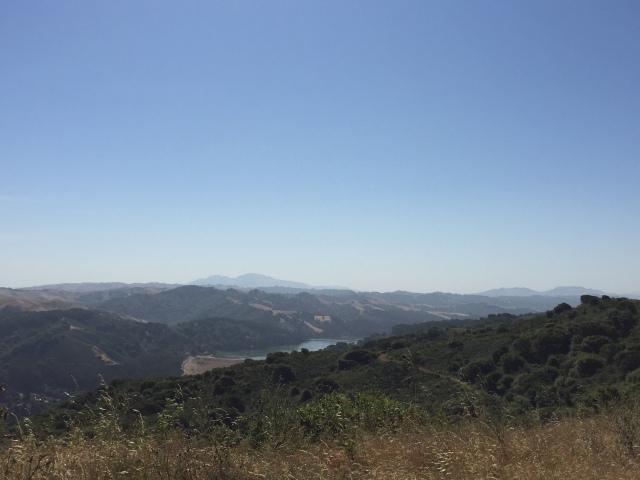
If you hadn’t been looking back and enjoying the views starting to form, you’ll be enjoying them now. If the weather’s clear, you’ll have the whole expanse of the upper East Bay before you, from Richmond to Berkeley, San Francisco across the bay, Angel Island, and Mt. Tamalpais all to your right.
To your left you’ll see the expanse of the East Bay hills with San Pablo Reservoir below you and Mt. Diablo in the distance. Scenes like this remind us how spectacular it is to hike in the Bay Area!
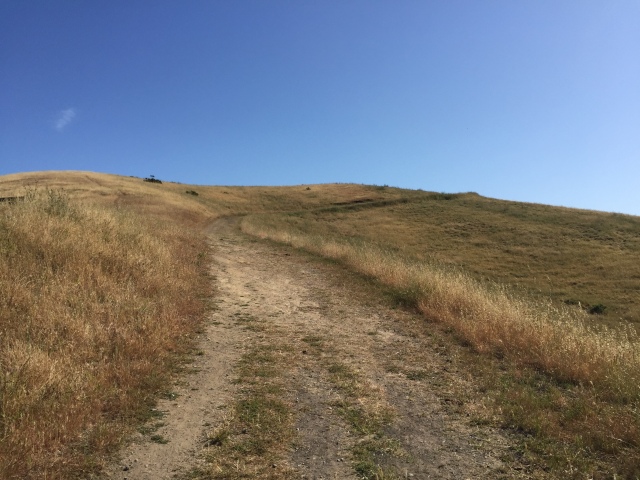
Enjoy the views as you walk along the ridge; a cakewalk compared to the climb experienced earlier. At 2.6 miles, turn left onto a small connector trail, then almost immediately turn right onto Nimitz Way. Round the hill and shortly after Nimitz Way becomes a paved multi use trail that continues all the way to Tilden Park. I opted to only follow it for 0.68 miles before turning right onto the Havey Canyon Trail at 3.4 miles.
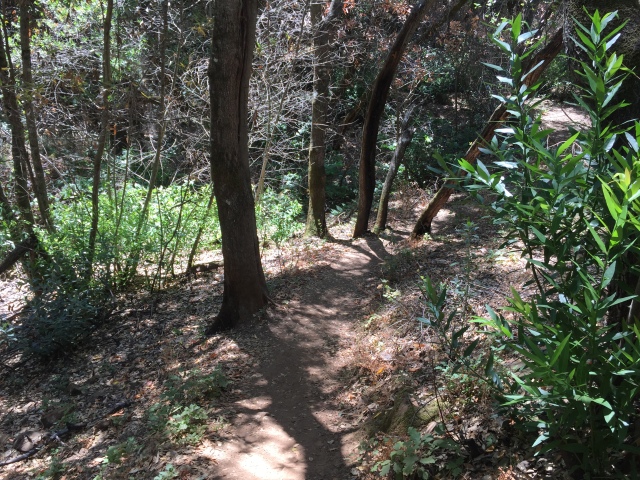
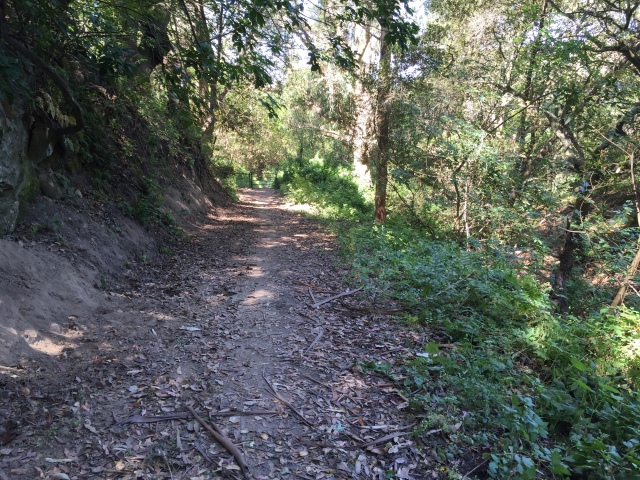
The Havey Canyon Trail was a completely different experience from hiking along San Pablo Ridge. Immediately the trail starts going downhill and enters into a lush, thickly vegetated canyon following a creek. This was a welcome change from the exposed ridge with no shade. The vegetation was so thick in fact that it was hard to believe I was still in the Bay Area. It reminded me of times when I’ve gone hiking in Washington State as a kid, where vegetation grows wild. Nonetheless, it was the smell of bay laurels hanging in the air that brought me back to home.
Shortly after entering the canopy the trail crosses the creek, which was fairly low at this time considering it was late May. I followed the Havey Canyon Trail for 1.5 miles and turned right onto the Wildcat Creek Trail at 5 miles.
The rest of the hike was relatively uneventful. The Wildcat Creek Trail is a wide multi use trail that follows the canyon containing its namesake, Wildcat Creek. It’s shaded in some spots and flat pretty much the whole way. It was fairly busy on this sunny Saturday and I had plenty of company as I hiked the last 2.2 miles back to my car. I did see a fox scurry across the trail near the end of my hike though, the one semblance of larger wildlife I saw on this hike.
Trip Stats
Distance: 7.24 miles
Time: 2.5-3 hours
Elevation gain: 900 feet
Fees: Parking and entrance are free
Directions: From I-80 Westbound, take the McBryde Ave exit in Richmond and turn left at the light. Head up the hill and go straight onto Park Ave as McBryde bears to the right. Follow Park Ave until the road dead ends at the parking lot.
Trail map from the East Bay Regional Parks can be found here.
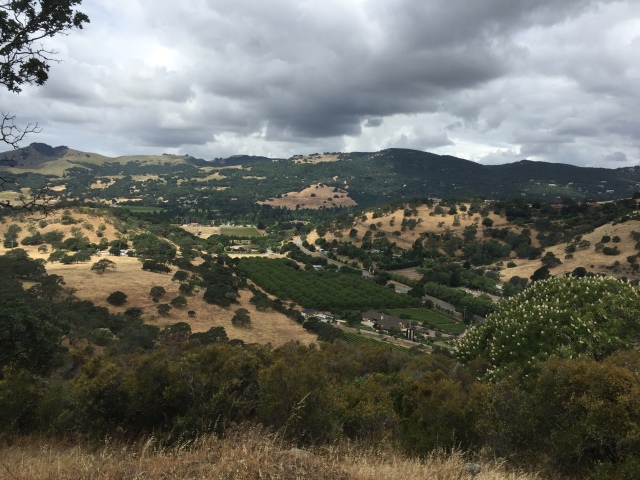
Sometimes it’s good to have a place nearby home that has lots of trails and a variety of terrain/vegetation that will keep you interested without driving far. For me, that place is Rockville Hills Regional Park near Fairfield. The numerous trails that crisscross the low oak studded hills above Green Valley allow me to get a good workout under occasional shade only under 30 minutes from my home. What more could I ask for?
Rockville Hills Regional Park, owned and maintained by the City of Fairfield, is 633 acres of oak woodlands and mixed broadleaf forests, along with grasslands among the hills between Suisun and Green Valleys. The city bought the property in the 1960’s intending to turn it into a golf course but push back from local residents killed the plan. Instead, it became a park popular for hiking, mountain biking, and picnicking. The best way to go hiking here is to come without a plan. Print out a map and bring it if you must, but it’s often better to just wander on the trails. The park is small enough that’s it’s quite difficult to get lost even when doing this. Bring out the inner explorer in you!
There are two main entrances to Rockville Hills. The main entrance and most popular is located off of Rockville Road on the north side of the park. There is a small parking area and pay kiosk, along with several picnic tables. The other entrance is located on the south side of the park and a little difficult to find. This is due to the fact that you can’t actually park right next to it. You’ll need to park on Emerald Bay Drive in a subdivision in Green Valley, then walk a quarter mile up a paved bike path to the actual entrance to the park. Though unsigned the trail is not too hard to find. On this particular day, I decided to use the south entrance.
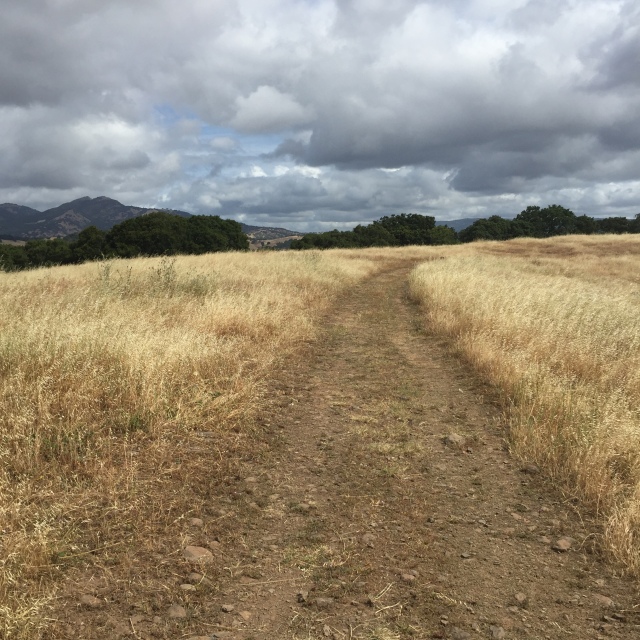
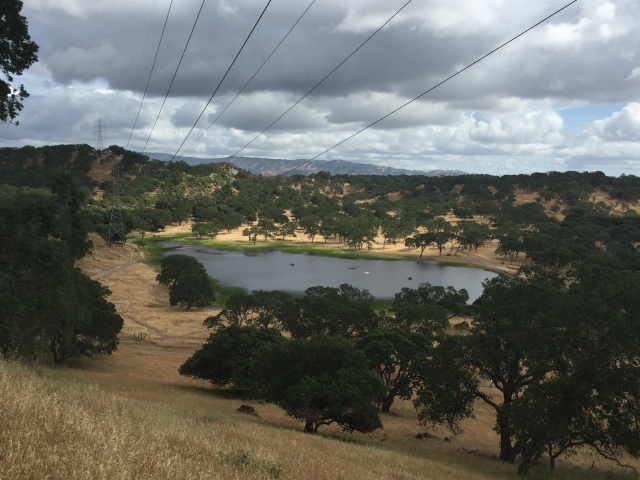
After entering the park I immediately started climbing a hill. It’s not insurmountable but the immediate elevation gain is a little unexpected at first. I hiked over the hill and after the first 1.5 miles reached the Upper Lake located in the center of the park.
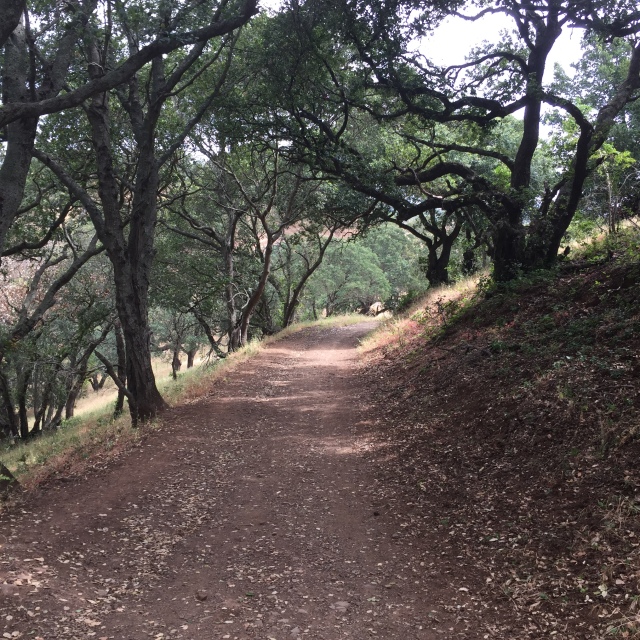
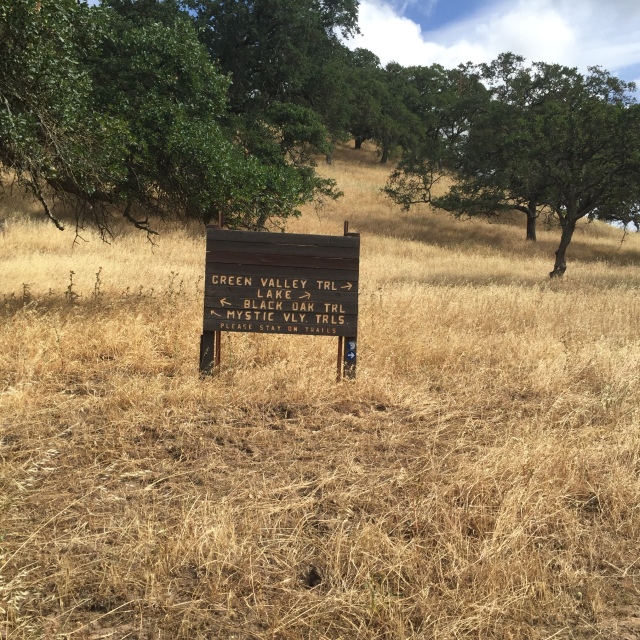
The starkness of the golden hills with the green grass surrounding the lake was a welcome sight. After spending a few minutes at the lake I hiked up into the hills west of the lake. I wound around on trails like the Outside Loop Trail and Upper and Lower Mystic Trails. Eventually the Mystic trails end up back at the Green Valley Trail that took me back to my car.
Throughout my hike I enjoyed great views of Fairfield and the surrounding valleys. The rolling hills are a golden color this time of year and pretty against the backdrop of oaks and other broadleaf trees. However I apologize that this trip report is a bit more vague than others. There are two reasons for this: I am writing this trip report a bit delayed and often when at Rockville, I don’t have a set route planned. Thus some of my route is a bit vague to me. As I mentioned before I highly encourage grabbing a map and wandering this park as I do if you’re in the area! It’s a great place to kill a few hours (if the weather isn’t too hot).
Trip Stats
Distance: 4.72 miles
Time: 2 hours
Elevation gain: 700 feet
Fees: Parking is free, entrance is $3 per person, payable at the kiosk at the main entrance. If using the south entrance there is no kiosk, so the sign directs you to pay at the main entrance.
Directions: From I-80, take the Green Valley Road exit, and go, north (left from eastbound, right from westbound). Turn right onto Westlake Road, then left on Lakeshore, and right onto Emerald Bay. Park at the second crossing of the bike path and hike north (to the left) towards the south entrance.
To reach the main entrance, go north on Suisun Valley Road from Interstate 80. Turn left onto Rockville Road and you’ll see the park entrance about a mile up on the left.
Growing up in Suisun, Rush Ranch was always a place that I went to on school field trips and various Boy Scout events. I learned all about local wildlife at the nature center, dissected owl pellets in the barn, and had a Boy Scout camporee there one year. Heck, I even had my Eagle Scout Court of Honor at the event hall at Rush Ranch. Many times over my youth I spent hiking its trails and exploring the tepee and Indian grinding rock they have on site. dn fact, Rush Ranch was my first real experience with hiking way back when I was in Cub Scouts. You could say that Rush Ranch holds some special memories for me, so I was excited to finally get back and explore its trails as an adult with a fresh new perspective.
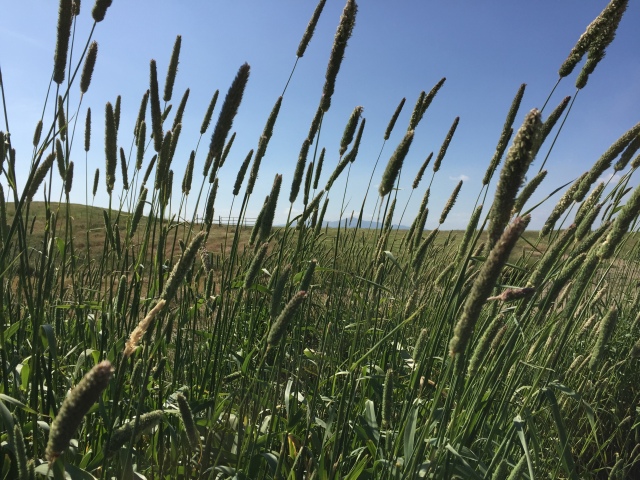
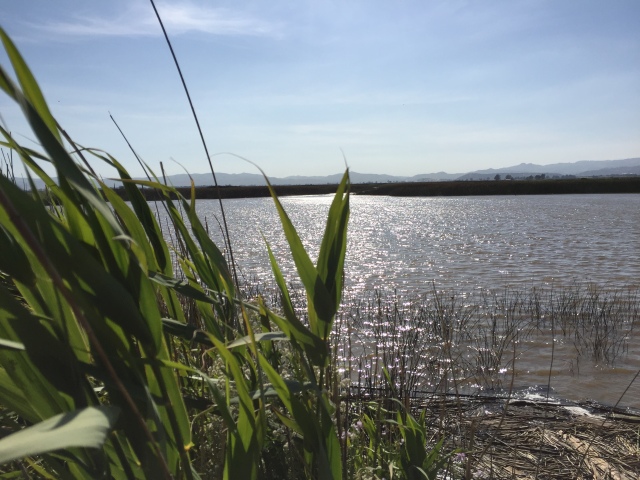
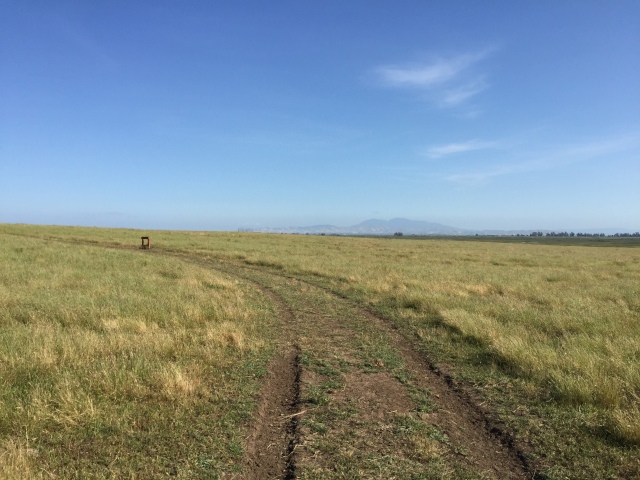
Rush Ranch, located in the Suisun Marsh south of Fairfield/Suisun City, has three main loop trails, the Marsh Loop, South Pasture Loop, and Suisun Hill Trail. Each are approximately a two mile loop. On this particular day, I did the Marsh Loop and part of the South Pasture Loop. The Marsh Loop runs through the northern part of the property and predictably, provides a great opportunity to view a section of the Suisun Marsh. I started out from the gate just to the north of the parking area. You’ll see a sign board with a map posted on it. Go through the gate and follow the trail north. At first you’ll be hiking through pastures and after about a half mile, the trail turns to the left around a hill and heads into more marshy landscapes.
I was surprised at the beautiful scenery and tranquility that I experienced. The trail follows a slough, though it’s not always in view due to tall reeds and grass around you. The water was blue and glittering in the afternoon sun, and the breeze gently rippled the grass and plants. And just like at Grizzly Island, I found myself falling in love with the marsh all over again. It may not seem like the prettiest landscape from a distance, but when you get up close you’ll be surprised what you find. Continue to follow the trail as it bends to the left again and heads back to the nature center.
After completing the Marsh Loop, I started the South Pasture Loop. As the name indicates, this loop has a bit of a different look to it than the Marsh Loop. The South Pasture Loop heads south and loops around through rolling pastures that harken back to the day when this property was owned by the Rush family and grazed cattle. Soon after the trail begins, you’ll see a turnoff to the right for the Indian grinding rock. Turn right and take a look, as it’s an interesting piece of early history. A sign explains the significance of the rock, which was used by the early Indians to grind acorns. Climb up the short hill and get a cool view of the marsh slightly below you. Here you’ll return to the original trail and head south again.
In the distance you’ll get great views of the rolling Potrero Hills and Mt. Diablo to the south across the strait. Normally I would say that I continued along this path until it looped back to the nature center, as this is what you would do in most cases. However, I was forced to turn back because a very large herd of cattle was blocking the path and I couldn’t find where it rejoined. Alas, another day I will be back to complete the loop fully.
Stats
Distance: 3.81 miles
Time: 1.5-2 hours
Elevation gain: Negligible, trail is almost completely flat
Fees: Parking and entrance are free
Directions: From I-80, take Highway 12 towards Suisun City. Turn right onto Grizzly Island Road and follow the road south into the marsh. The ranch is on the right about 4 miles down the road.
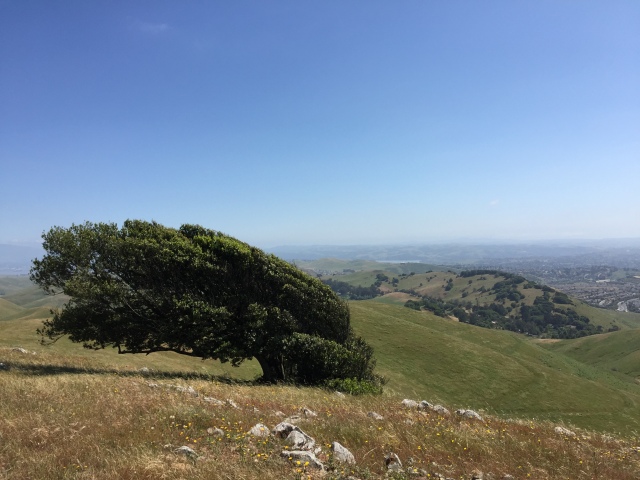
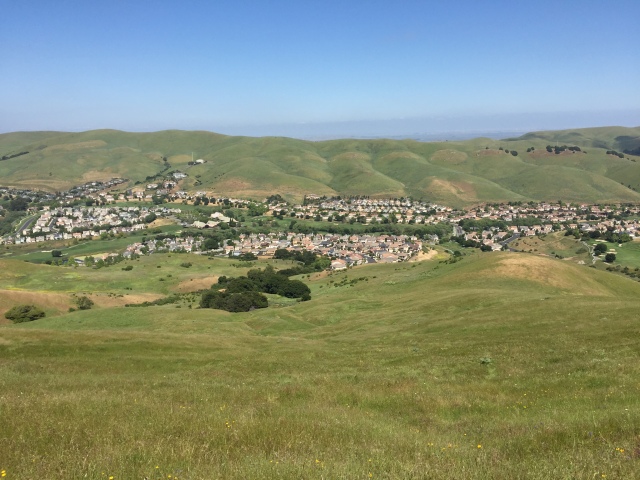
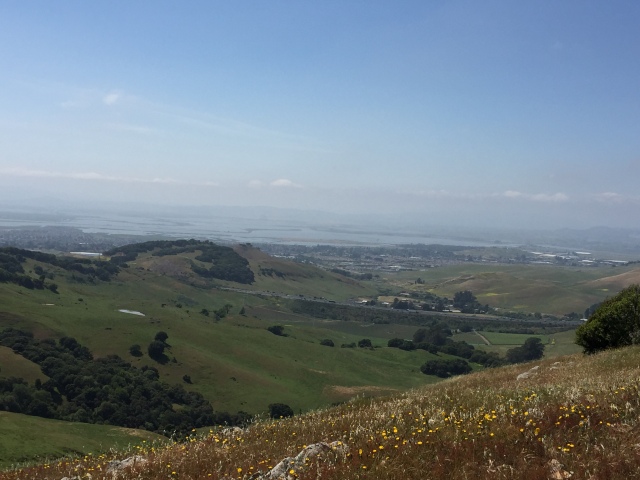
Of all the places you’d expect to see a trail leading to hilltops with soaring views, it’s probably not in a suburban housing development. Yet this is exactly what the Hiddenbrooke Trail offers. The trail is so named for the nearby housing community, an outpost of the city of Vallejo. It’s a fairly short out and back or semi loop trail that heads up into the open space that separates Hiddenbrooke from the rest of Vallejo and offers great views from the top of Vallejo/Benicia, San Pablo Bay, and beyond.
The only bad part about this hike is there’s no parking at the trailhead, so you’ll have to park down the hill at the small park-and-ride lot at I-80 and McGary Road. Walk up Hiddenbrooke Drive to the east and the trailhead is 0.4 miles up the road. The trailhead is on the right side of the road marked by a large signboard with a Bay Area Ridge Trail map.
Immediately, you’ll start to climb into the hills, with views of Hiddenbrooke to your left and behind you at times. The trail is fairly easy to follow, though at times it seems to disappear into the grass. Climb the first hill and you’ll start to get a taste of some of the views you’ll experience at the top. About half way you’ll see a fork where the trail splits. Take the left split and go around the hill. You’ll climb around the side and eventually loop around it and summit.
From here you’ll get your best views of the hike. Vallejo/Benicia and San Pablo Bay come into view, as well as most of the East Bay, Mt. Tam, Mt. St. Helena, and other nearby landmarks depending on how clear it is. I spent several minutes at the top just soaking it in. It helped that there was a nice breeze rippling the wildflowers around me; a very peaceful scene. You’ll also notice an old boxcar at the summit of the hill, which is a bit odd and curious when one thinks about how it must have gotten up to the top of this hill. At this point you can head back the way you came, or the trail continues downhill in the opposite direction and eventually dead ends among houses at the bottom of the hill. I chose to make it an out and back hike and headed back the way I came. Total hiking time was only about 90 minutes; a nice, quick sojourn into the hills with big payoffs in terms of views. I’d recommend it for those who are in the area but want something quick, or if you live in Vallejo/Benicia. It’s also a great after work hike during the warmer months with more daylight.
Stats
Distance: 4.12 miles
Time: 1.5-2 hours
Elevation gain: 600 feet
Fees: None, parking and entrance are free
Directions: From I-80, take the Hiddenbrooke Rd/American Canyon Rd exit and turn right (from eastbound), or turn left (from westbound). Turn right onto McGary Road and park in the small lot to your right. Walk up Hiddenbrooke Drive for 0.4 miles to the trailhead.